Getting Started
RelateCRM consist of few main resources which are considered to be key to your sales process, as well includes other useful features like sending emails, activities, web forms, as most of the features are similar, we will try to explain in a more general way how to create, delete and update records for a resource.
Create Record
- When logged-in in RelateCRM, from the sidebar choose, Contacts, Companies or Deals.
- Depending on the record you want to create from the right side, click e.q. Create Contact.
- Based on the record you are trying to create, fill the form information.
- Click Create.
After the record is created, if the selected owner user is different from the user that created the record, the User Assigned To Contact mail template will be sent to the record owner.
The fields shown in create forms for Contacts, Companies and Deals can be modified in Settings->Fields.
Update Record
To update a resource record, you will need to do this via the record view, for example, when you are viewing the contacts table, click on any contact name, you will be redirected to the contact view, where you can see all the contact related information, like associated companies, deals, attachments...
The record information fields will be shown on the left side where you can adjust the fields and update the record.
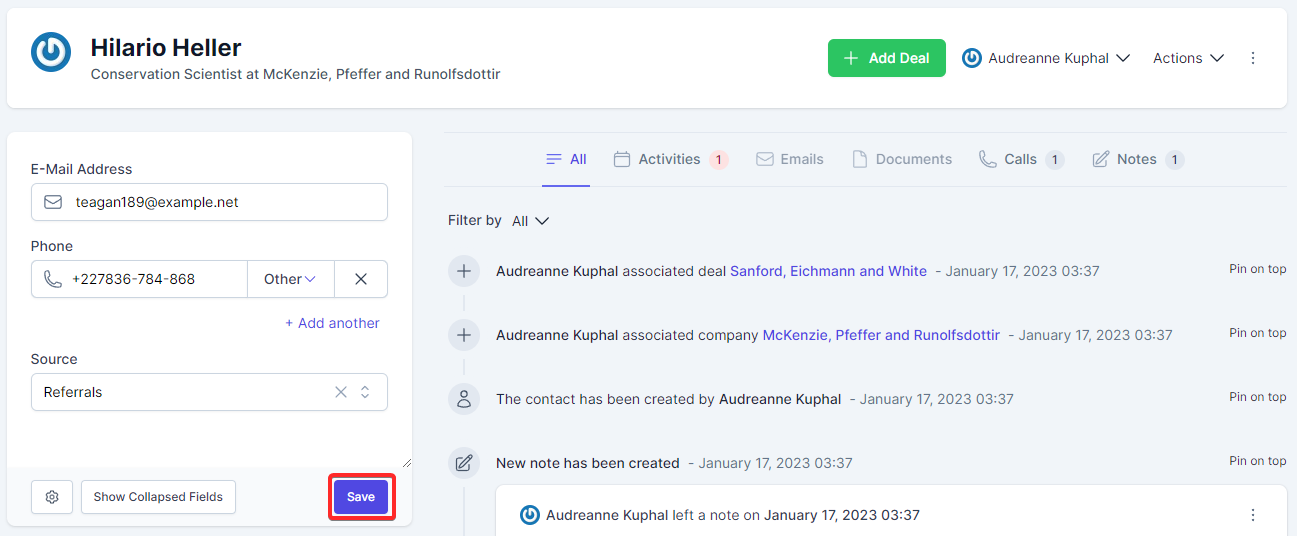
If you don't see all the fields configured to be shown by default (not collapsed), click the "Show collapsed fields" button.
The fields that are shown on the view form are based on the view fields configured for the resource in Settings->Fields, you can customize the fields by navigating to Settings->Fields.
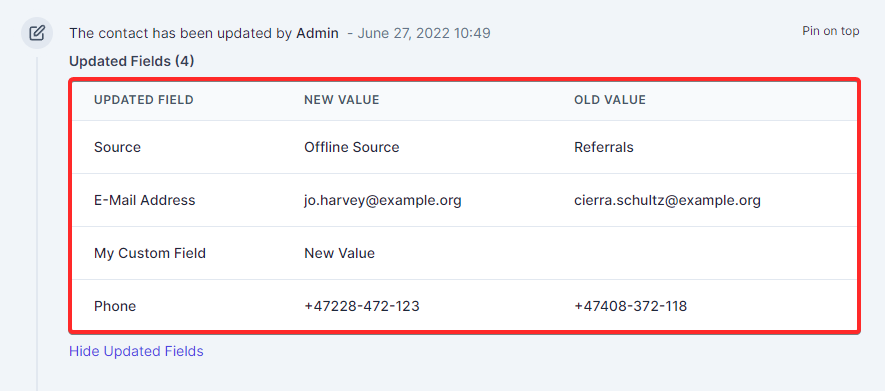
Update Log
Each time a team member updates the resource record information, a log for this record will be created and will be displayed on the timeline, the log will provide you all the record information that is changed by the update, as well which team member performed the update.
You will have a clear overview of all the changes performed on the record after creation and track the sales process without any hesitation what information was changed or who performed a change.
System and custom fields of type Textarea are not included in the update log.
Delete Records(s)
There are multiple way to delete a resource record, via table actions, via table delete button and when viewing record using the actions.
Via Table Actions
When viewing the record table, use the checkbox on the left side to select the records(s) you want to delete and then select the "Delete" action from the available table actions dropdown.

Via Table
Click the ellipsis icon displayed on the first column in the table and then click delete.
When Viewing Contact
When viewing record, use the top actions dropdown and select the "Delete" action.
DELETE NOTES
-
When deleting deal, contact, company, the emails associated with the record won't be deleted from your mailbox.
-
When you are deleting a record, for example, contact, the associated companies and deals won't be deleted from the contact, RelateCRM will only dissociate from the deleted contact but they will be still available in RelateCRM, if you want the associted companies and deals to be removed, you will need to do this manually. The same is applied when deleting companies and deals too.
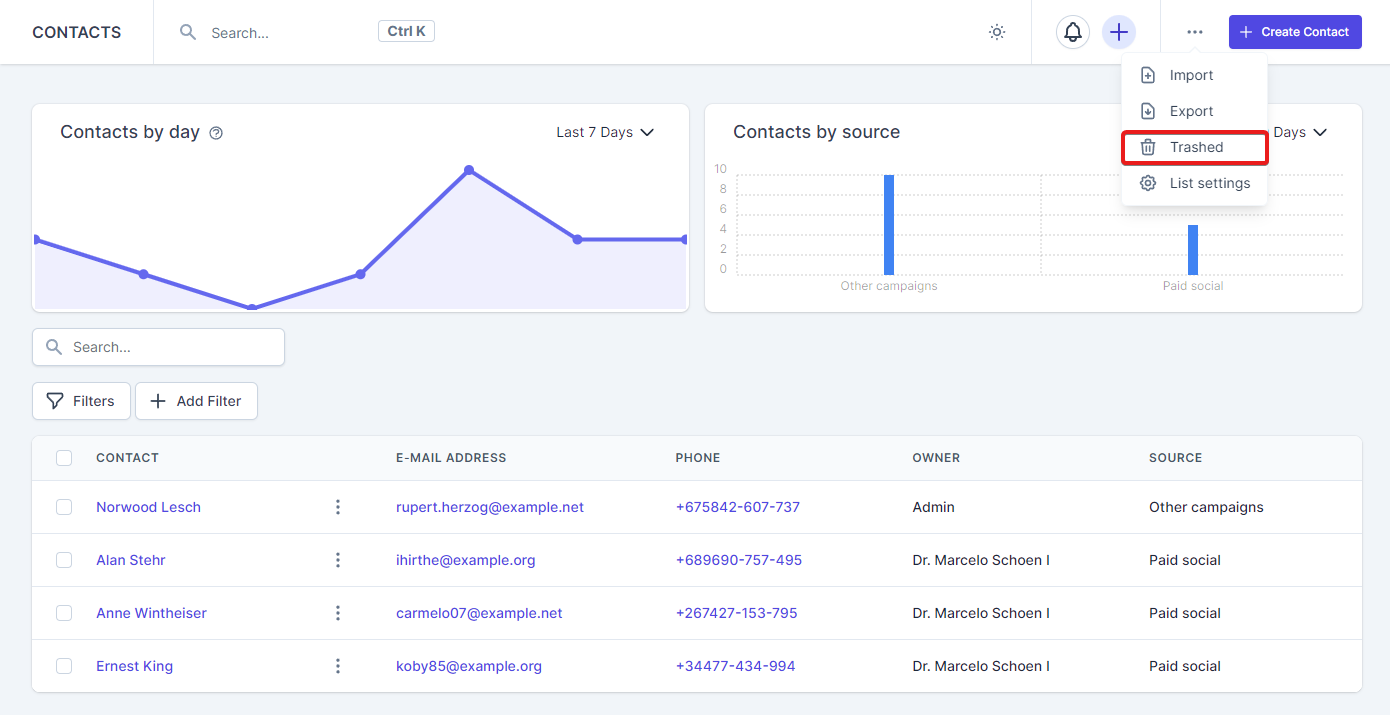
Trashed Records
One of the key features in RelateCRM is the trash feature, the deleted resource records will go in the trash and they will remain there for 30 days, after 30 days from the deletion, the record(s) will be purged automatically,
Imagine that an employee accidentally deletes contact, you can go to the contact trash and restore it.
The trashed records will remain in the trash for 30 days, after that, they will be removed from the database, however, if you wish, you can delete them permanently from the trash manually.
Follow the steps below to view the trashed records.
- For the resource you want to view the trashed records, navigate to the resource list view.
- Click the ellipsis button located on the top right side.
- Click Trashed.
Resources With Trash Support
The following resources supports trash:
- Companies
- Contacts
- Deals
- Documents
- Products
Primary Records
When associating for example, contacts to companies, the first associated contact to the company will be the actual primary contact for this company, RelateCRM will use the primary record for sending emails or workflows, for example, if the company does not have email address added, will look at the associated company contacts to find a automatically populate the "TO" field based on the primary record email address.
The same logic is applied for the other resources as well, imagine you create a deal and associate the deal with a contact, the first associated contact will be the primary contact for the deal.
Notes
On each contact, company or deal you can add notes for the record you are viewing, the notes are used for personal usage for you and your team members to keep track of important notes for the record.
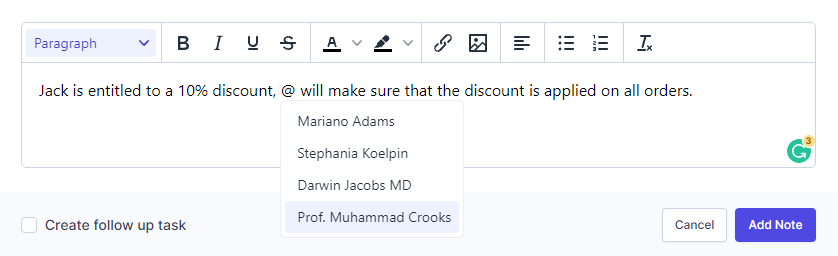
Create Note
To create note follow the steps below.
-
Navigate to record profile, for example, contact.
-
Click the the Notes tab.
-
Click Add Note.
-
Enter the note you want to leave for the record. TIP: Type @ to mention team member
-
If you need to create follow-up task regarding the note, for example, if you need to perform a specific task regarding the note you are creating, you can do this by checking the Create Follow Up Task option and select the appropriate date as per your needs.
-
Click Add Note to save the note for the record.
If you selected "Create Follow Up Task" the task will be automatically created with the proper date and associations and will be automatically assigned to the user that created the note.
All notes are visible to the team members that are able to view the record.
Make sure that the team member you are mentioning is actually able to access the record where you are creating the note in order the team member to view the note that he is mentioned in.
Edit And Delete Notes TIP: Double click on note description to edit
- Navigate to the record profile.
- Click the the Notes tab.
- Find the note you want to delete or edit.
- On the top right side, click the ellipsis button and then click edit or delete depending on the action you want to perform.
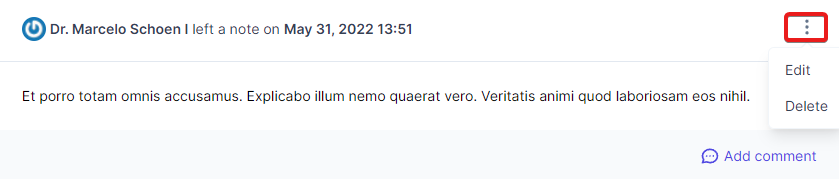
A note can be edited or deleted by the user who created it, or by a Super Admin.
Associations
RelateCRM has very flexible and useful feature when you want to fully organize your sales process and have clear overview of your data, to associate records to multiple resources. For example, a contact may be associated to many companies and deals.
Imagine you have a deal, this deal may be related to multiple companies or contacts. When you associate the deal to the appropriate contacts and companies, now whenever you visit either the company profile or the contact profile, you will be able to see this deal and have clear overview of everything that is related to the deal.
The same is applied when you visit the deal profile, you will be able to see all contacts and companies related to this deal and communicate directly via the deal profile with all the associated contacts.
- Open the deal profile you want to add associations.
- For example, if you want to associate contact, click the Add Contact button.
- (1) If the contact is already created, use top search field to search for an existing contact.
- (2) If the contact is not yet created, you can create the contact directly from the record profile view and the contact will be automatically associated to the record.
- Click Create or Associate
Note that you can apply the same steps from a contact or company profile.

Customize List View
A very neat feature RelateCRM has is to customize the list view, including the default sorting as well the fields that are visible on the table.
You can tailor the list view for your company requirements and remove any unnecessary fields that are not suitable for your workflow.
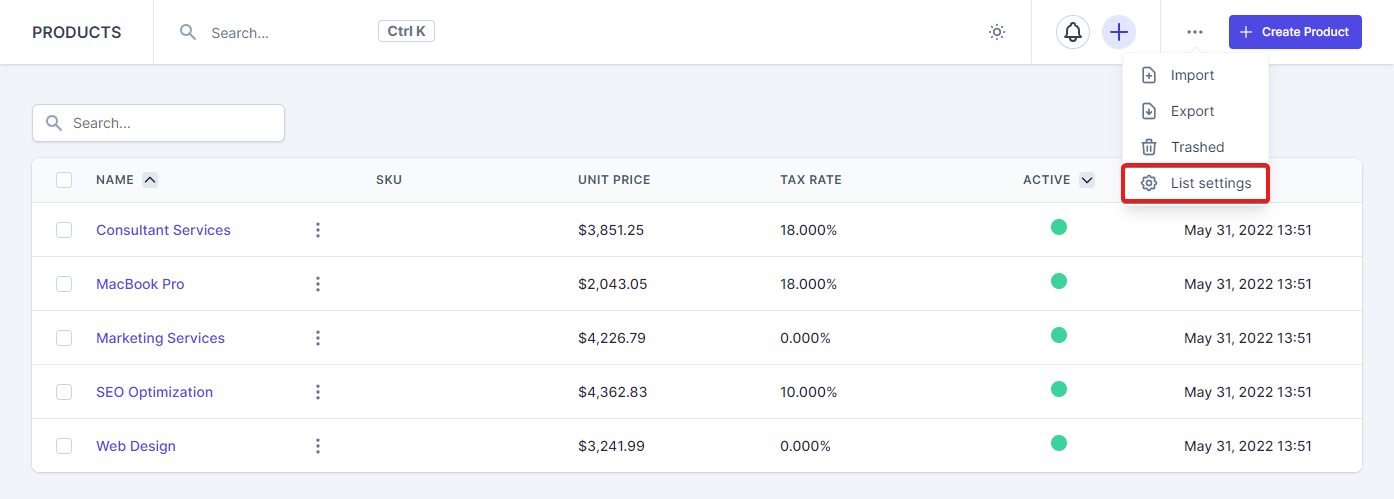
- Navigate to the resource list view.
- Click the ellipsis button located on the top right side.
- Click List settings.
Resources With List View Customization Support
The following resources support list view customization:
- Contacts
- Companies
- Deals
- Documents
- Activities
- Products
- Users
Record Tabs Badges

Each resource record like deal, company or contact has it's own tabs based on the data, each tab has a badge next to the name, so you and your sales reps can easily identify the number of actions taken or the actions that needs to be taken for the record when you view the record profile.
Each badge represents a number for the data the record has, find below explanations of what the badge number next to the name shows.
-
Activities
Indicates the total number of unfinished activities for this record.
-
Emails
Indicates the total number of unread emails for the user.
-
Documents
If the record has unsent documents, indicates the total number of documents that needs to be sent, otherwise, indicates the total number of documents for the record.
-
Calls
Indicates total number of logged/created calls.
-
Notes
Indicates total number of notes created.
-
Products
(only for deal) - Indicates how many products the deal has.