Receive and Send Emails
In RelateCRM you can send and receive emails via the email accounts you connected before. The emails can be associated with contacts, companies and deals, so you can have clear overview of all the communication between you and your team members.
The Inbox emails feature works almost identically like any other email client with few more improvements which are related to RelateCRM.
Before starting the using the Inbox emails feature, make sure to check the known limitations.
Send Mails
Send Via Inbox
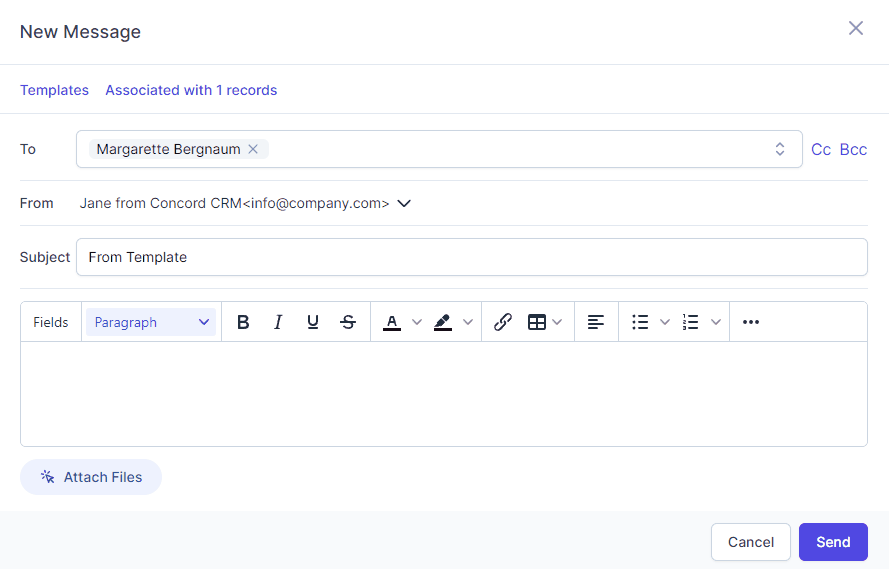
To compose new email follow the steps below.
-
Click on Inbox menu item.
-
Click the Compose button.
-
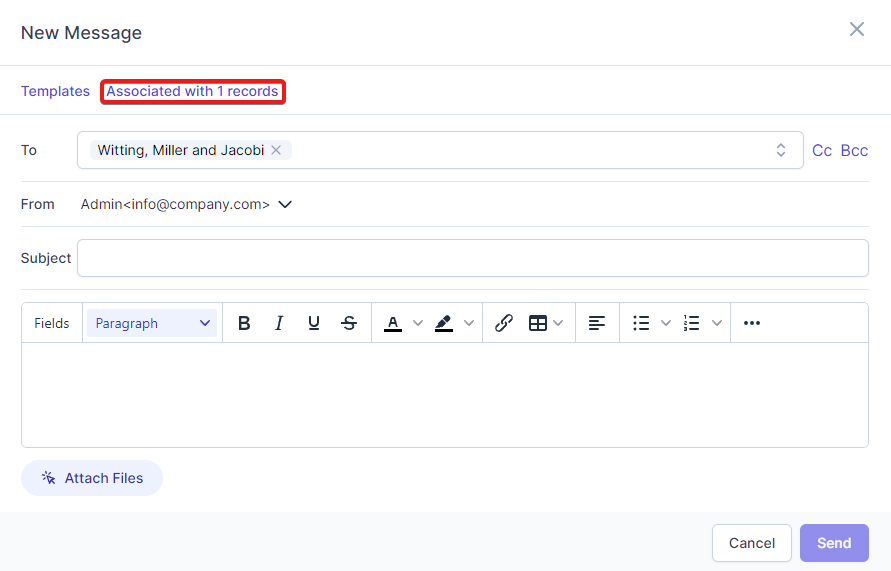
In the To field, search for companies, contacts or enter an email address.
If you select, contact or company, RelateCRM will automatically associate the email with the record profile, however, you can still manually associate the email with other records if it's needed.
-
Enter email subject.
-
In the editor area, enter the email message.
-
If you need to attach files, click the Attach Files button.
-
Click Send.

When sending emails directly via Inbox menu item, if you don't search and select the record (company, contact) via the To field and instead enter the record email address directly, the email won't be associated automatically with the record.
Send Via Record Profile
To send an email directly via record profile, for example, send email while viewing the contact profile follow the steps below.
-
Navigate to the contact profile.
-
Click on the Emails tab.
-
Click Create Email.
The Recipients field will be auto populated and the email will be auto associated to the record.
-
Enter Subject.
-
Click Send.
Reply To Emails
Reply Via Inbox
To reply to an email follow the steps below.
- Click on Inbox menu item.
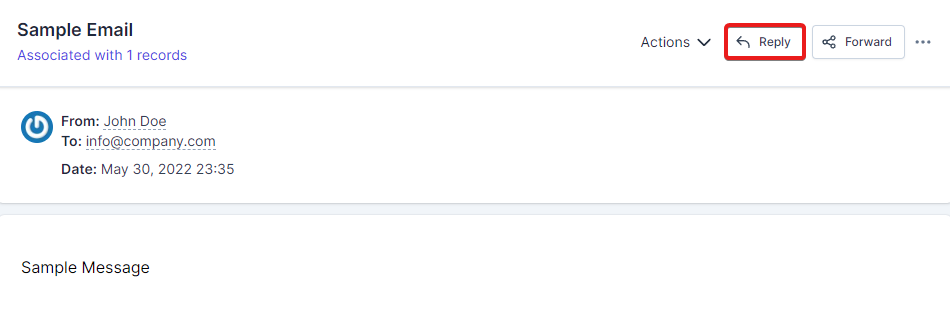
- From the emails table, find the email you want to reply to and click on the subject.
- Click on the top right Reply button at the top of the message.
- Enter your reply message.
- Click Send.
Reply Via Record Profile
If the email message is associated with the a record profile, for example contact, this email message will be visible in the record profile and you can easily reply to the message.
-
Navigate to the contact profile.
-
Click on the Emails tab.
-
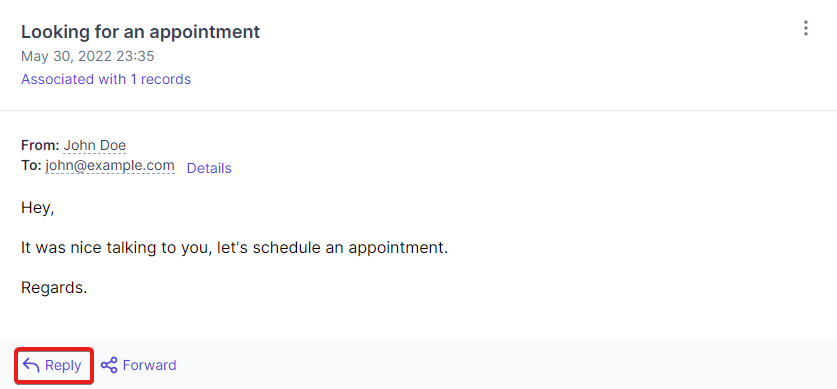
Find the email you want to reply to.
-
Click Reply button at the bottom of the email.
The Recipients field will be auto populated and the email will be auto associated to the record.
-
Enter your reply message.
-
Click Send.
Predefined Templates
With templates, you can save repetitive email content as an email template. Before sending a template, you can personalize and tailor the content to your recipients.
Create Template
- Navigate to Inbox and click Compose.
-
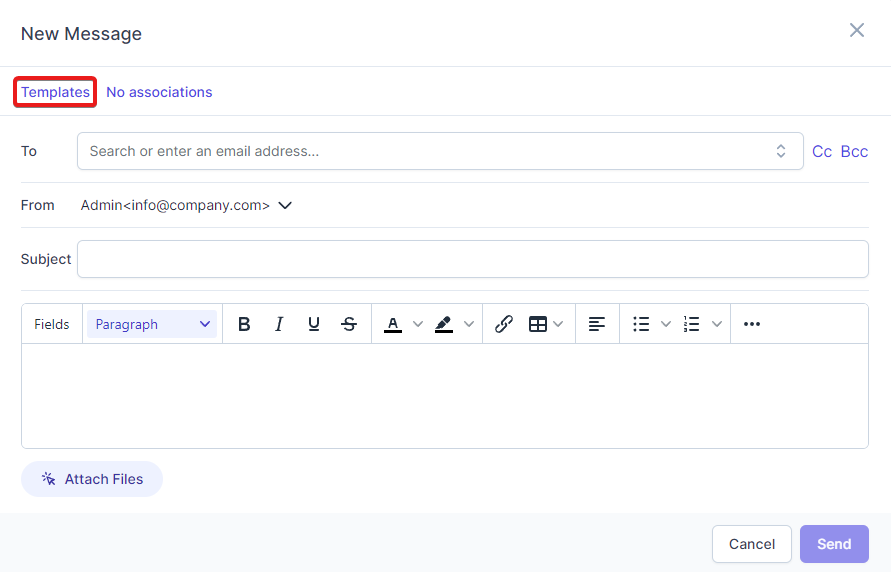
Click on Templates and then click on Create Template.
NOTE
Adding image in predefined templates is not supported in the current version.
-
Enter name and subject for your template.
-
Enter body of the template.
-
To share the template with other team members, select Share this template with other team members?.
This option can be used when you want to create more general template and you want other team members to be able to re-use this template when composing new emails, in this case, the template will be visible for other team members.
-
Click Create.
Now when you will compose new email messages, you will be able to select this template to automatically insert into the email message you are composing.
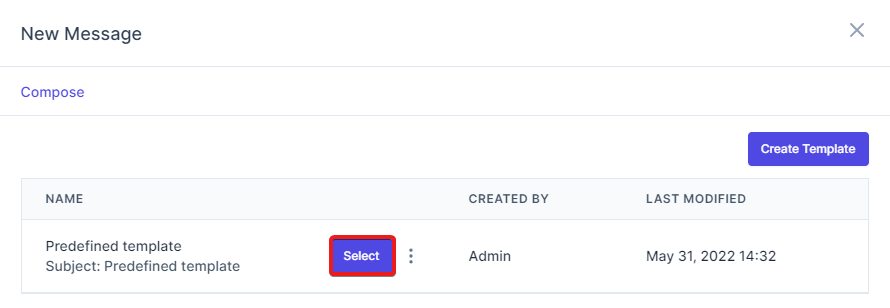
Use And Send Template
To use the template into your email message, you can either do this via record profile or when composing new email message via Inbox->Compose.
- For example, navigate to Inbox and click Compose.
- Click on Templates and then hover on the template you want to use and click Select.
- The template message will be embedded into the new email editor.
Delete Template
- Navigate to Inbox and click Compose.
- Click on Templates and then hover on the template you want to delete and click delete button.
Please note: a template can only be deleted by the user who created it, or by a Super Admin.
Placeholders
In RelateCRM you can use placeholders for your mails, the placeholders will be automatically filled based on the mail recipient information and can be edited further if needed.
Using placeholders helps you and your sale agents save time, avoid mistakes in mails and close deals faster.
Placeholder can be added directly in the mail editor content when composing a new email or use it with combination with the predefined templates, you can use the placeholders in your template and after the template is selected, RelateCRM will replace all the template placeholders with their appropriate values based on the recipient.
To create a template with placeholders follow the steps below.
- Navigate to Inbox and click Compose
- At the top, click Templates
- Click Create Template
- Enter name and subject
- Click the Fields button on the editor.
- Focus in the editor where you want to insert the placeholder and choose the placeholder from the available placeholders list.
The placeholders for deals and companies can be used only when sending mails directly from the deal or company profile or if company is selected as recipient.
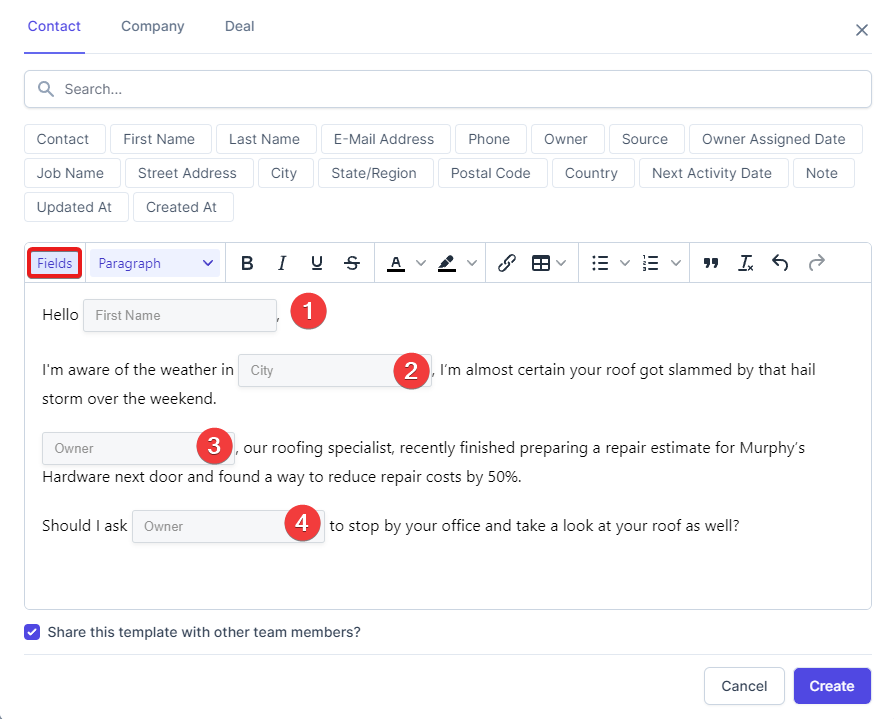
If you did not entered a recipient prior to inserting the template the template placeholders will be blank, you can fill them manually or RelateCRM will fill them when you enter recipient from the To field, you can even use custom fields as placeholder, note that for technical reasons not all custom fields can be added as placeholders.
Synchronization
Cron Job
The emails are synchronized via cron job every 3 minutes, in order to avoid any synchronization issues, make sure that your cron job is properly configured.
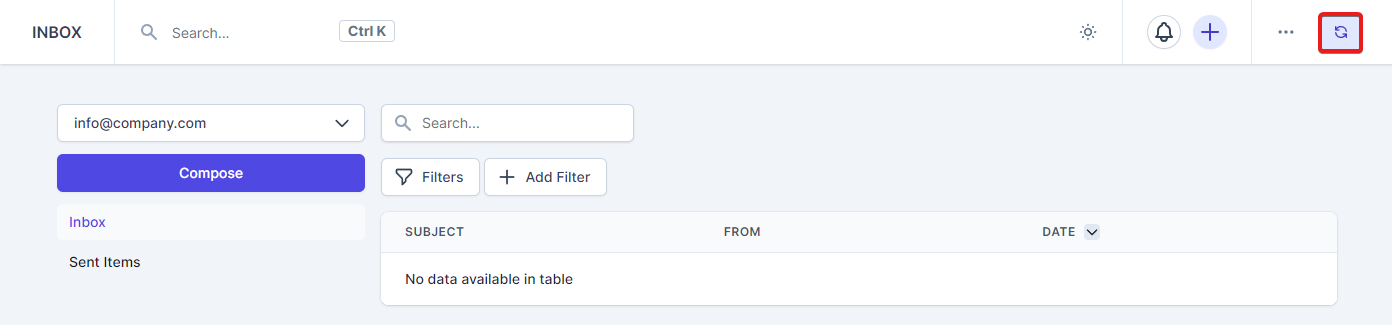
Manually Sync
In case, you need to perform manually sync for quick sync, when viewing your emails, click on the top right sync button, see the image below.
By clicking the button, will invoke manually sync for the current email account you are viewing.
Manual sync is available only after the email account is first time synchronized via cron job.
Configure Pusher
As RelateCRM is SPA (Single Page Application), full refresh of the page is not performed on each click or navigation, in this case, RelateCRM use Pusher and Sockets to trigger page refresh when is needed, for example, when new emails are available or when emails synchronization is finished.
To see the new synced emails, unread messages etc..., without the need to reload the page, we strongly recommend you to configure the Pusher integration for best experience.
Disabling Sync For Account
In case you need to temporary disable synchronization for an account you have connected follow the steps below.
- Click the Inbox menu item.
- Click the right side three dots button and choose Manage Accounts.
- Toggle the Disable Sync option.
