Microsoft Integration
- Register New Azure Application
- [Add Permissions](#Add Permissions)
- Generate Microsoft Application Client Secret
- Add Application ID And Secret Key In RelateCRM
To use Microsoft integration, you will need to register an application in the Microsoft Azure portal, sign in (if you don't have an account yet) to the Microsoft Azure using either work, school account or a personal Microsoft account.
Make sure that your RelateCRM installation is publicly available and uses the https protocol, as Microsoft uses Webhooks and makes requests to the application in order to synchronize calendar events.
Register New Azure Application
-
Go to Microsoft Azure App Registrations.
-
Click New registration.
-
Application name
Enter a meaningful application name that will be displayed to users of the app.
-
Supported account types
Select Accounts in any organizational directory (Any Azure AD directory - Multitenant) and personal Microsoft accounts (e.g. Skype, Xbox)
-
Redirect URI
- Choose platform Web
- In the Redirect URI field add your RelateCRM installation URL and append /microsoft/callback, for example https://crm.domain.com/microsoft/callback
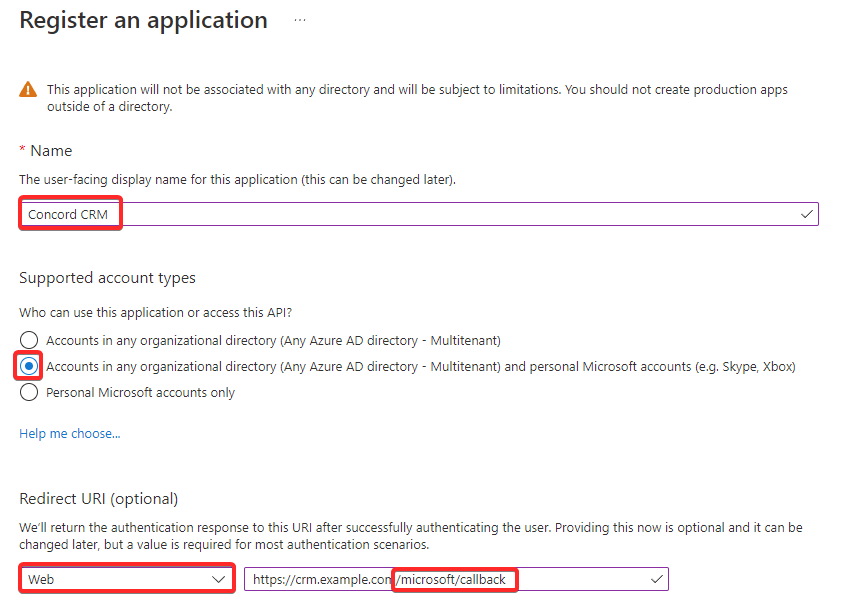
You can retrieve your Microsoft Redirect URI in RelateCRM Settings->Integrations->Microsoft
[Add Permissions](#Add Permissions)
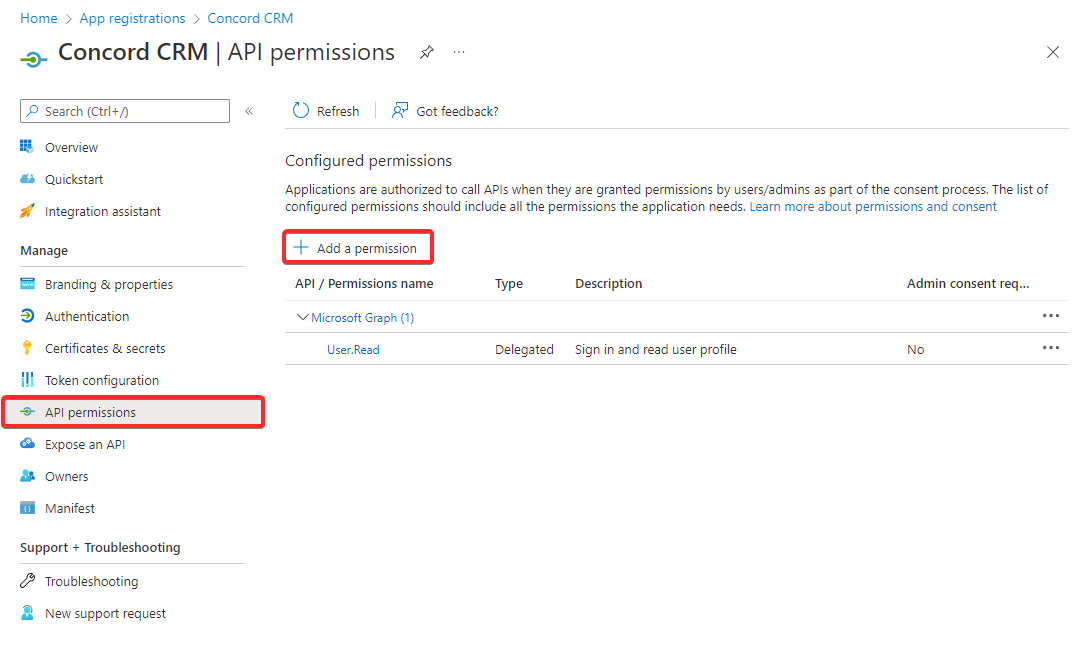
After you create the application you must add the required permissions for the application.
-
Go to the application you just created.
-
On the sidebar click API Permissions.
-
Click Add a permission.
-
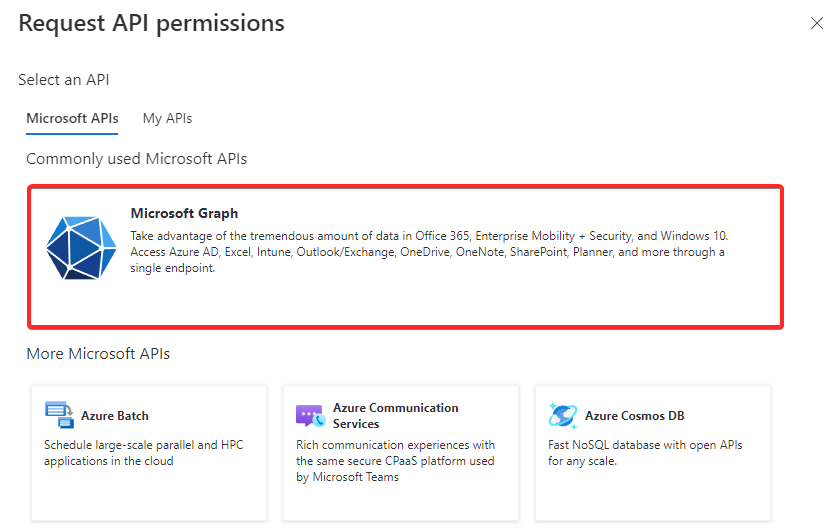
Click on Microsoft Graph.
-
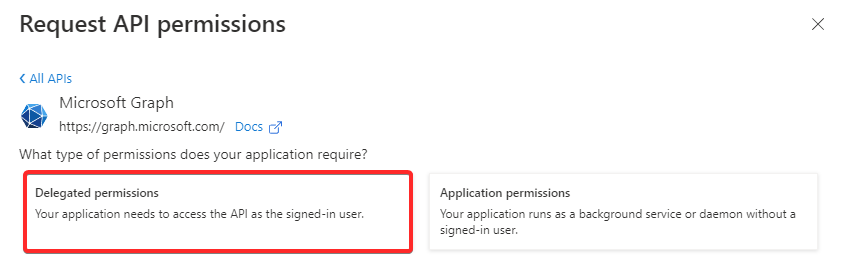
Click on Delegated Permissions.
-
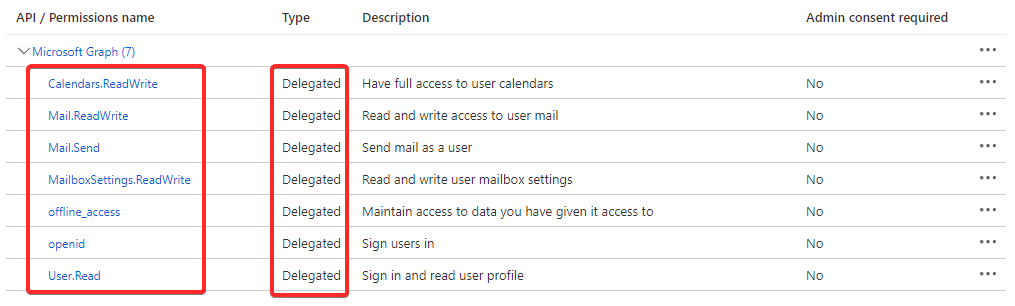
Search and select the following permissions:
- Mail.ReadWrite
- Mail.Send
- MailboxSettings.ReadWrite
- Calendars.ReadWrite
- openid
- offline_access
- User.Read (if not already selected)
After you add all the permissions, your permissions table should look like this:
Generate Microsoft Application Client Secret
-
On the sidebar click Certificates and secrets.
-
Click the Client secrets tab.
-
Click New Client Secret.
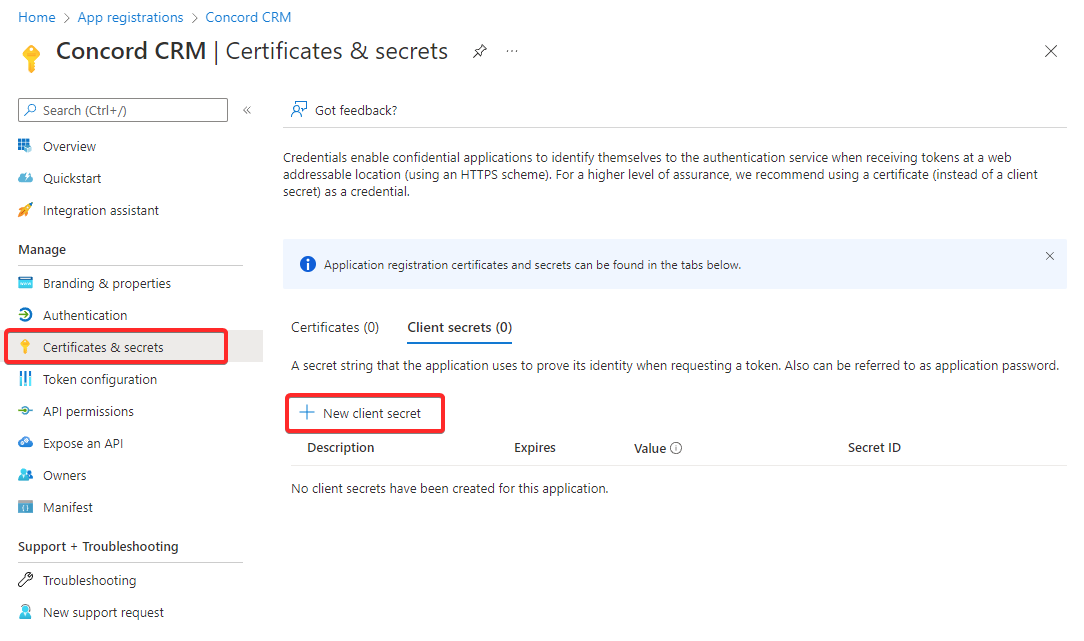
-
Add meaningful description e.q. "RelateCRM Secret".
-
Set expires to "24 months".
-
Click "Add".
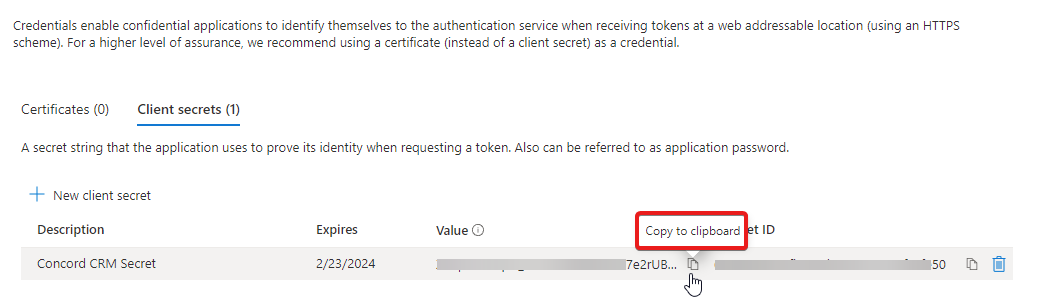
After you create the secret, copy the new client secret value. You won't be able to retrieve it after you perform another operation or leave the Certificates and secrets page.
Add Application ID And Secret Key In RelateCRM
Now, the final step is to add the application id and the secret key in RelateCRM.
- In RelateCRM, navigate to Settings->Integrations->Microsoft.
- In the App (client) ID field, add your Microsoft Application ID, check the image below to find out from where to get the application id.
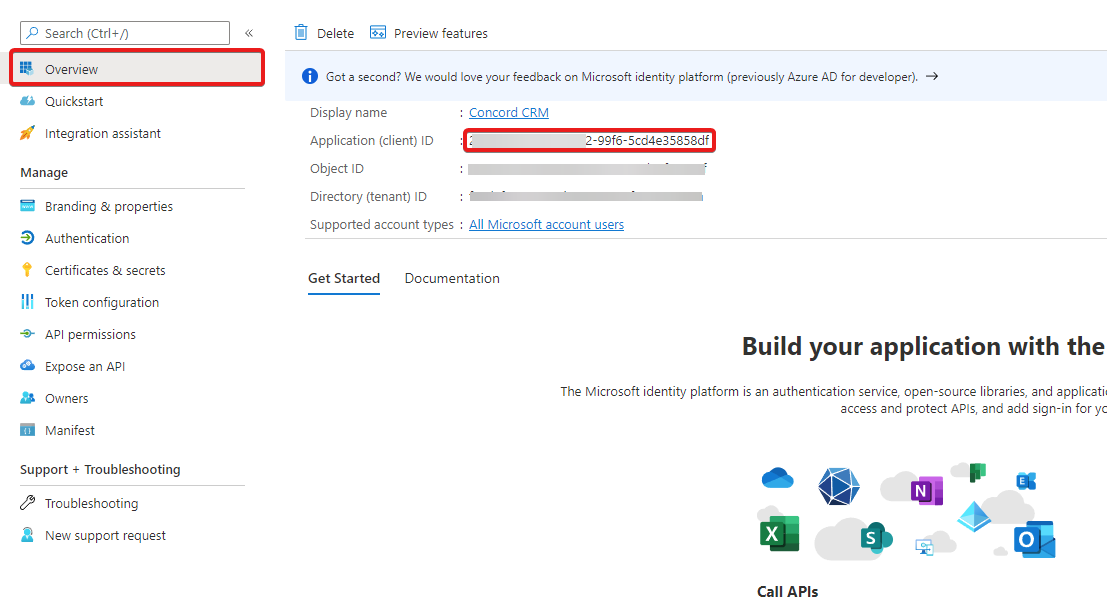
- In the Client Secret field, add the secret key you created and copied in the previous step.
- Save Settings.