Google Integration
- Create New Google Developers Console Project
- Configure OAuth Consent
- Create OAuth 2.0 Credentials
- Enable Gmail API
- Enable Calendar API
- Add Client ID And Client Secret In RelateCRM
- App Verification
- Scopes Access
Before RelateCRM can start using the Google OAuth integration, you must set up a project in the Google API Console to obtain OAuth 2.0 credentials, set a redirect URI.
Because RelateCRM is a standalone self hosted crm application and is installed on your server and you are the data controller and responsible for processing all the data, you will need to configure additional config on the Google Developers Console page.
Create New Google Developers Console Project
- Go to the Google API Console.
- Click Create project, enter a name for example "RelateCRM", and click Create.
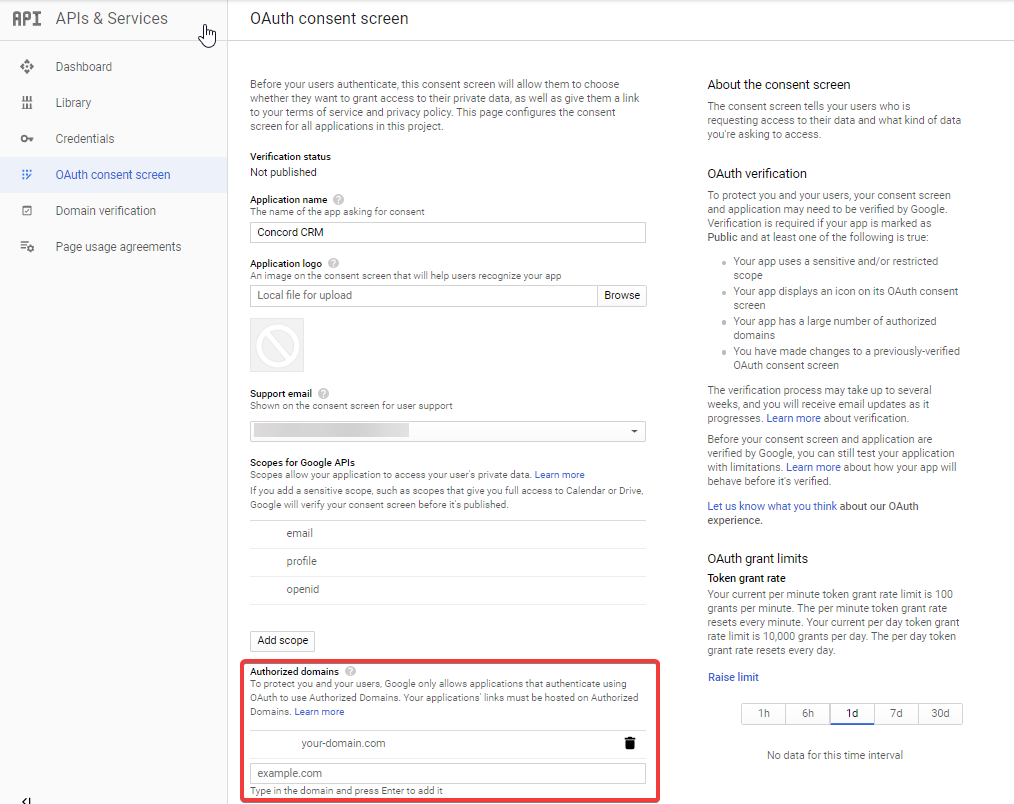
Configure OAuth Consent
To enable your project's consent screen:
-
Open the Consent Screen page in the Google API Console.
-
If prompted, select the project you created previously.
-
Application name
Enter a meaningful application name that will be displayed to users of the app.
-
Add your domain where you installed RelateCRM in the authorized domains section.
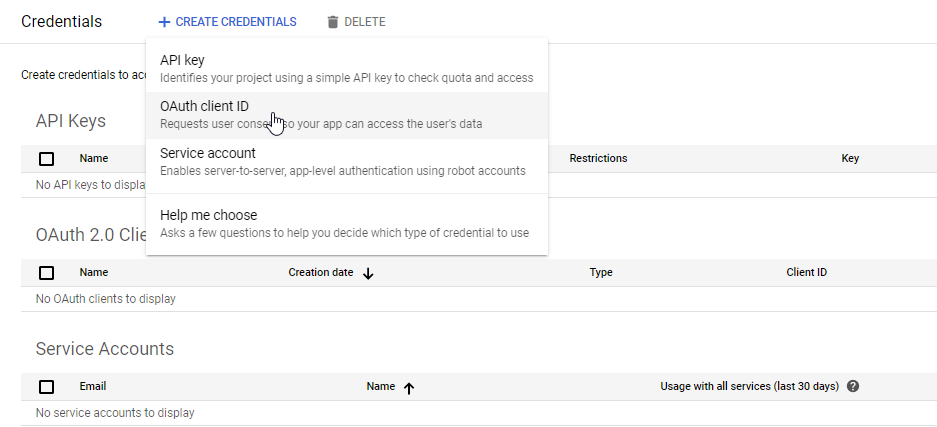
Create OAuth 2.0 Credentials
You need OAuth 2.0 credentials, including a client ID and client secret.
- Go to the Credentials page.
- Click Create credentials, then select OAuth client ID.
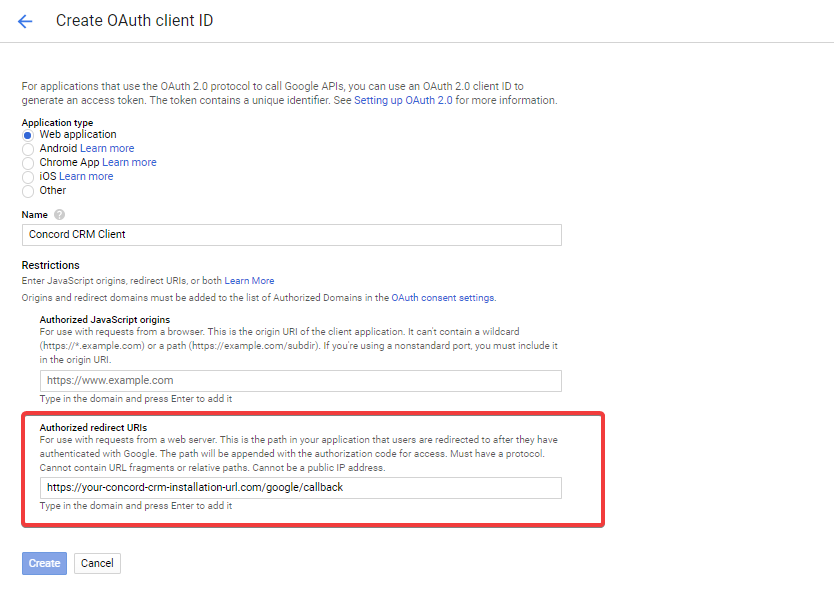
- For "Application Type", chose Web Application.
-
Add Authorized redirect URI.
In the Authorized redirect URIs, add your RelateCRM installation URL and append /google/callback, for example, https://crm.domain.com/google/callback.
You can retrieve your Google Redirect URI in RelateCRM Settings->Integrations->Google
Check the image below for more information about the OAuth Client ID Configuration.
After the OAuth Client is created, copy the Client ID and Client Secret, as you will need to add them in RelateCRM later.
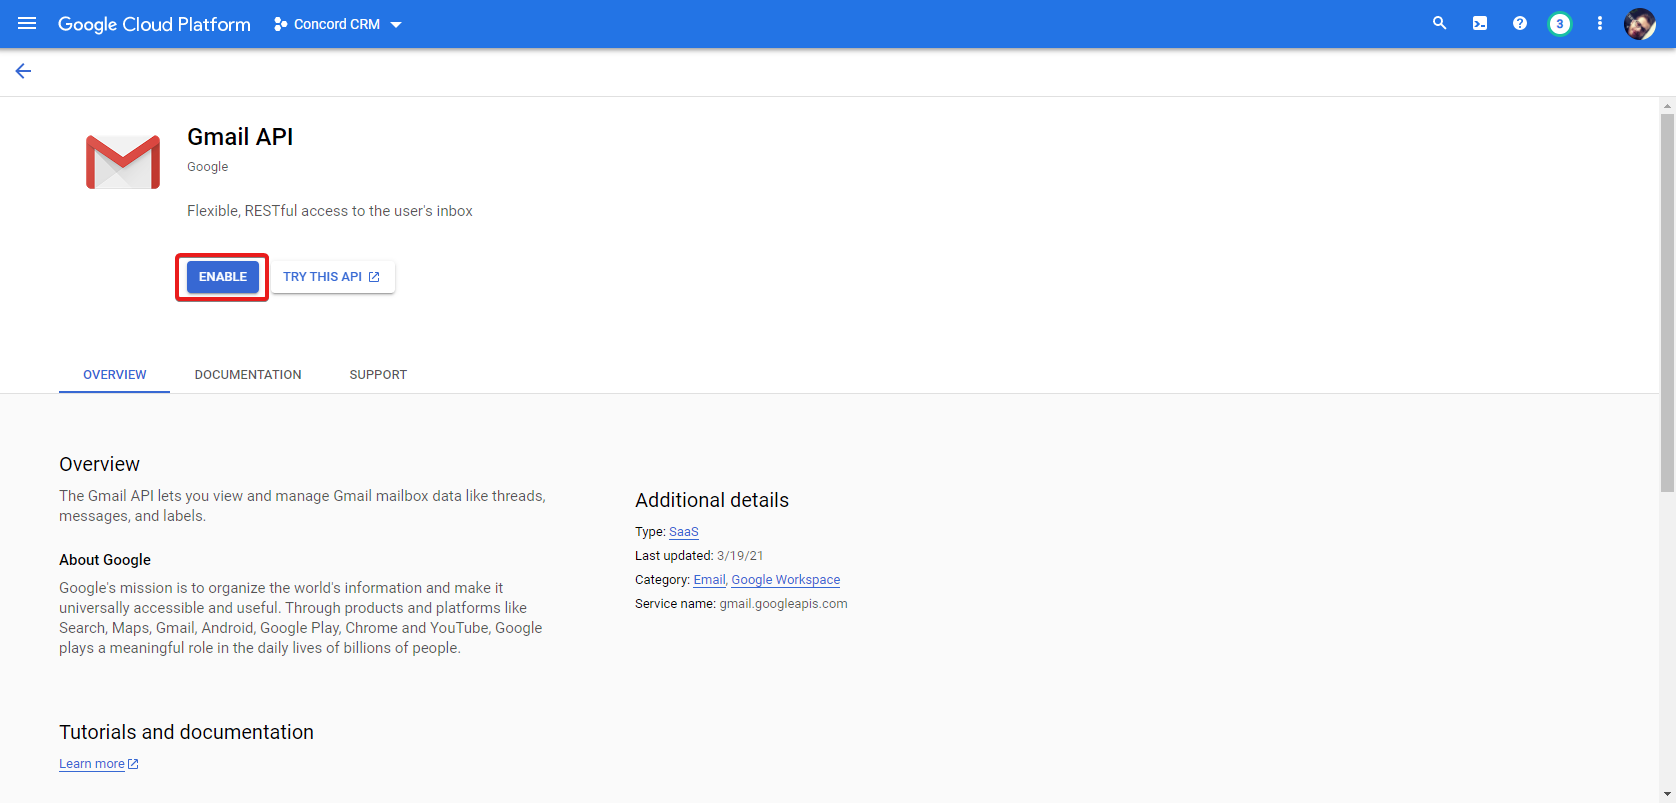
Enable Gmail API
- Open the Library page in Google API Console.
- From the projects list, select the project you created previously. (if not selected)
- Click Enable APIs and Services.
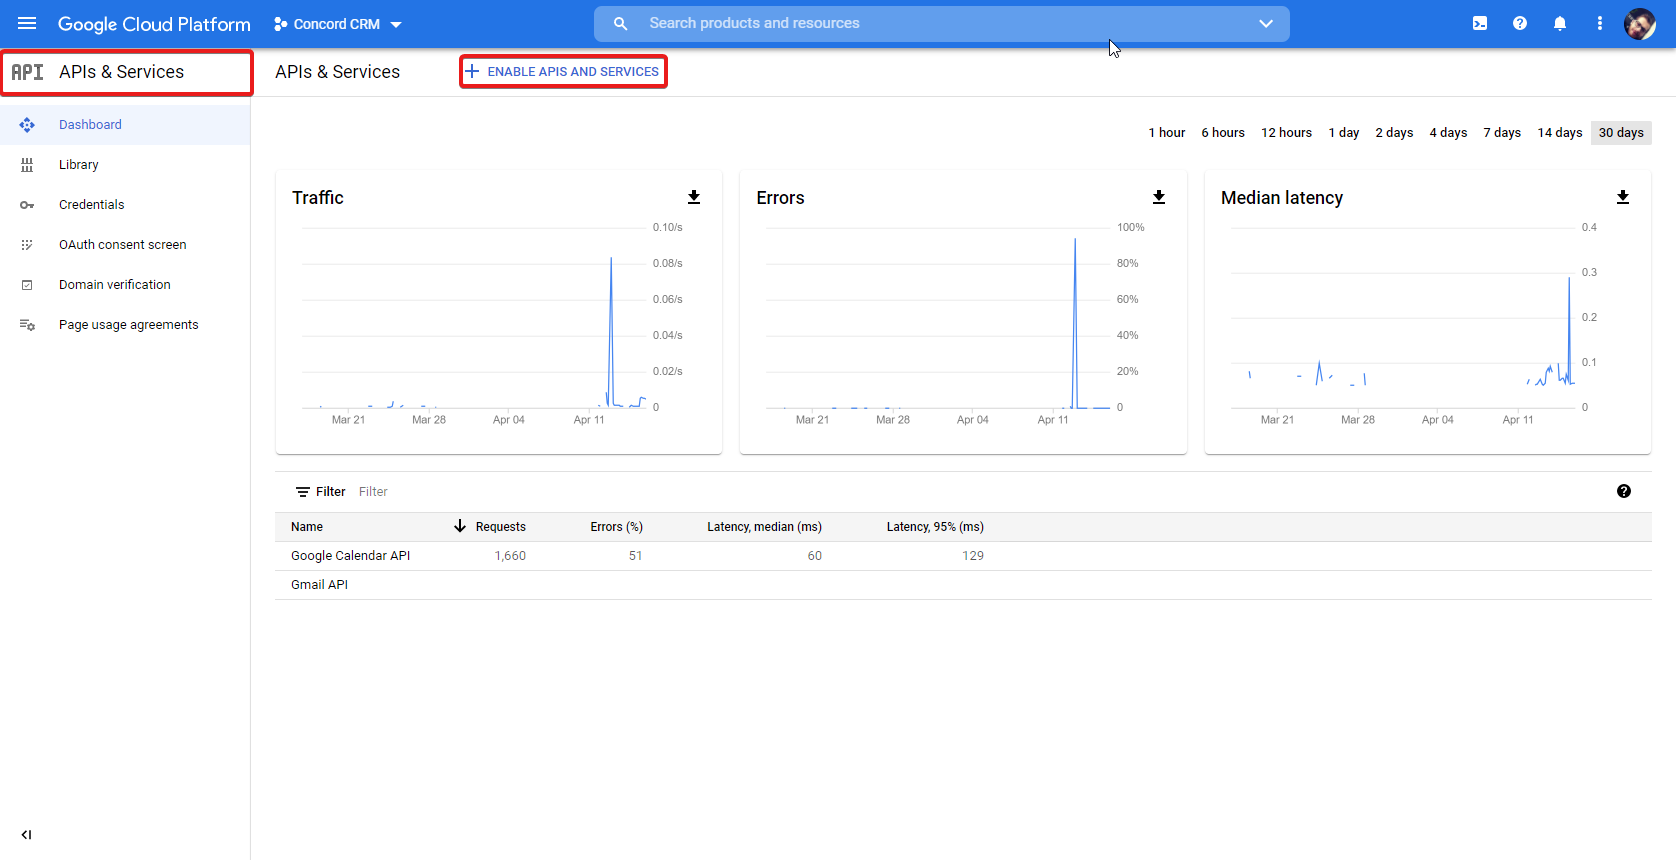
This will take your to their API Library. Simply search for "Gmail" and choose the Gmail API.
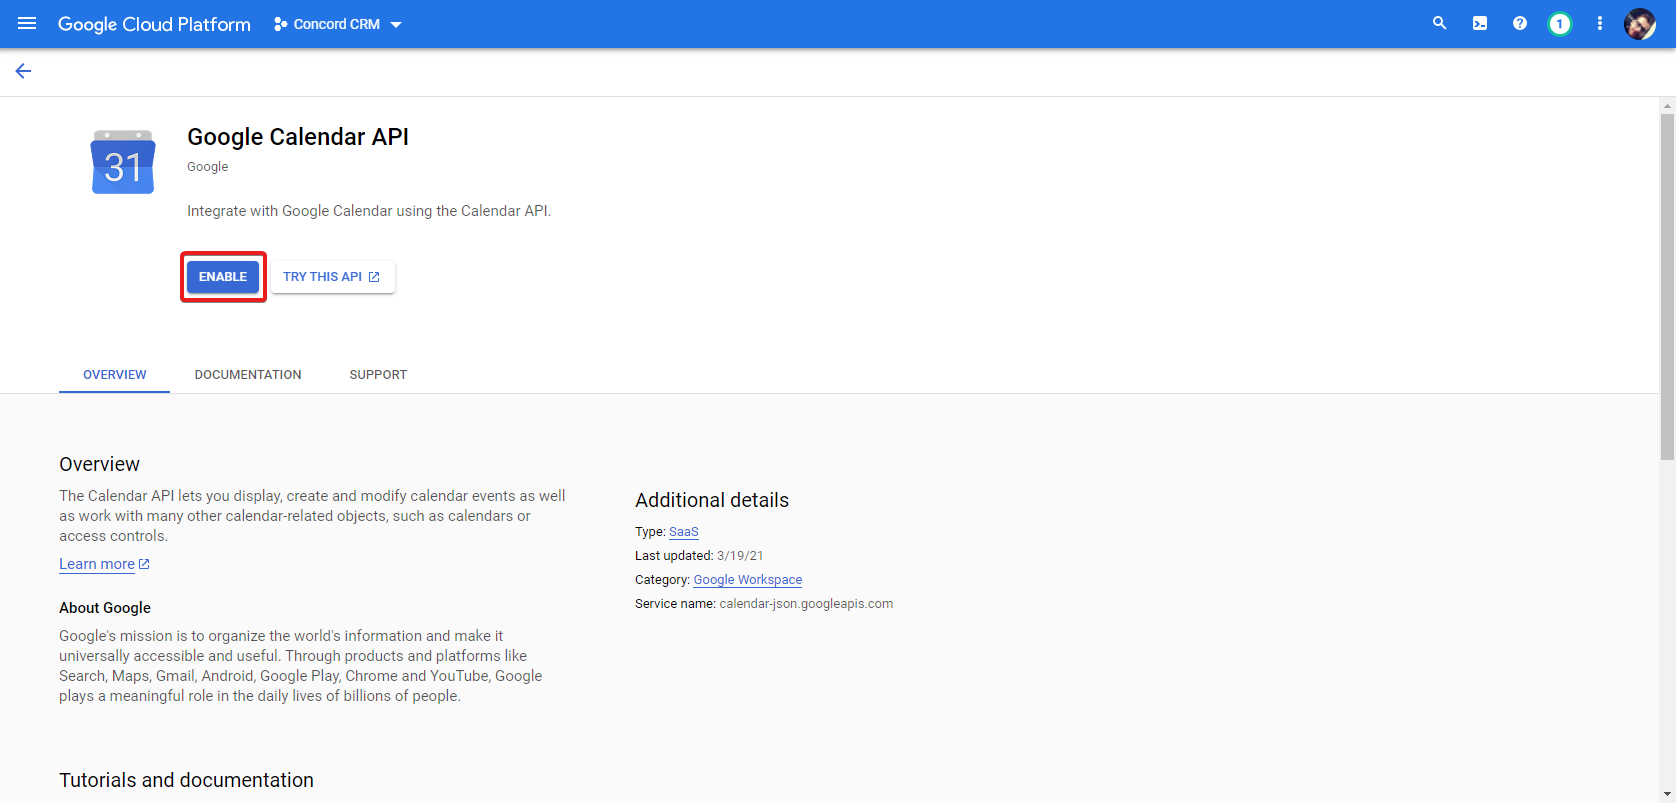
Enable Calendar API
- Open the Library page in Google API Console.
- From the projects list, select the project you created previously. (if not selected)
- Click Enable APIs and Services.
This will take your to their API Library. Simply search for "Calendar" and choose the Google Calendar API.
Add Client ID And Client Secret In RelateCRM
- In RelateCRM, navigate to Settings->Integrations->Microsoft.
- Add the Client ID and Client Secret.
- Save Settings.
App Verification
You may need to verify the Google application. It's your responsibility to ensure that the Project/App you created is verified.
When RelateCRM will try to authenticate e.q. email account, after you select your Google account, probably you will see a message “This app isn't verified“, the verification process is clearly explained by Google and all the steps how you can verify your app, as RelateCRM does not hold any data for your company, you will need to verify the application on your own.
If you don't want to verify the application click on Advanced then Go to App Name (unsafe) just to test this feature for your own account.
When Google asks for privacy policy URL, if you have a privacy policy for your main website, you can use this privacy policy or you can use RelateCRM privacy policy feature.
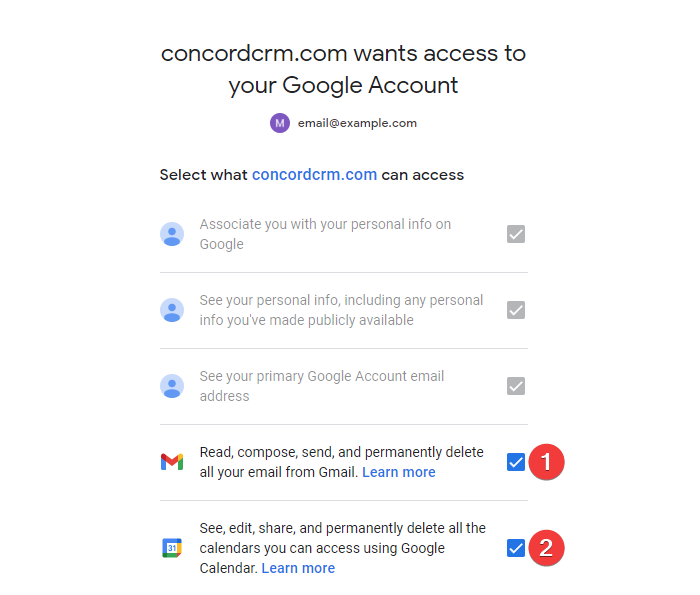
Scopes Access
When RelateCRM will try to authenticate e.q. email account, make sure to check the scopes marked on the screenshots below.